Anyone Can Attach a Patch
Whether you’re purchasing patches specifically for your employees’ uniforms or you’re more interested in resale, the question of how to get the patch from the box onto its final resting place is a common concern. If you’re feeling worried that only a professional will be able to get your patch adhered to the proper place, then rest assured that there’s actually nothing to be concerned with.
While we offer a list of different attachment options for the back of your patches, we also recommend sewing your patch into place no matter which option you’ve chosen. However, if you’re looking to do so, there’s no need to hire an expert to bring the project together. Here are some quick and easy pointers for attaching your new patch.
Instructions for Sewing Your Patch Into Place
If you’re choosing an order of patches with no backing or with PVC backing, there’s no choice but to sew the patches into place. However, the following instructions should also be applied to patches with other attachment options chosen too. Following these easy steps will lead to the simplest and sturdiest attachment for your custom patch.
You’ll need:- Your custom patch
- Appropriate thread
- Pins (optional)
- A sewing needle
- A thimble
- A lighter

Instructions:
- Choose either an invisible (clear) thread (clear fishing line works well), or a thread that won’t stand out against the patch.
- String the thread through the eye of your needle. Once you’ve got roughly a foot of thread, cut your thread and tie a knot into the two ends flying free.
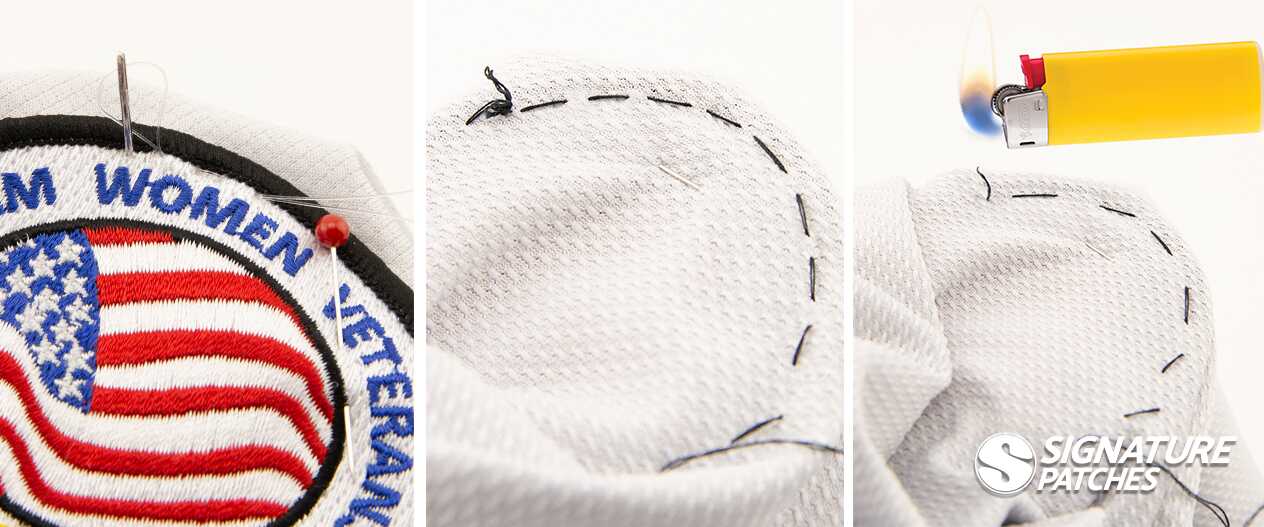
- Place your patch exactly where you want it to go. Use the pins to secure the patch in place and stop it from moving while you sew.
- With your thimble(s) on, push your threaded needle up through the back of the fabric and the patch at any point on the patch that’s close to the edge.
- If your patch has a merrowed edge, you should be able to see the stitches where the edge meets the border of the patch. Try to keep your stitches as close to that area as possible.
- If your patch has a heat cut edge, try to stay as close to the edge as possible.
- With PVC patches, a recessed sew line is included on each patch.

- Pull the thread taut until the knot you tied prohibits you from pulling any more thread through.
- Choose one consistent direction to move in and bring the needle and thread down through the patch and the fabric towards that direction.

- Repeat steps 4 - 6 all the way around the edge of the patch at equal intervals.
- Once you return to the place you began, with your thread at the back of the patch, cut any excess thread, and, using your lighter, burn the ends of the thread together.
To Iron or to Sew
When ordering your custom designed patches, you’ll need to select the appropriate backing option. While some of the options offered clearly inform the manner in which you’ll attach the patch when you receive it (iron on for example), other options don’t make mention of attachment at all. Patches with those backing options will have to be sewn into place.
As the name implies, if you select the iron on backing option, your patches will need to be ironed on (any household iron will get the job done). However, if you select either the no backing, or the PVC backing options, your patches will need to be sewn into place. Customers who order patches with no backing tend to know what they’re getting themselves into. It’s with the PVC backing that confusion can set in.
At a glance, iron on and PVC backings look very similar. However, if you go to try and iron on a PVC backed custom patch, you’ll be quite frustrated and could potentially ruin the patch, article of clothing and your iron in the process. To tell the difference between these two similar options, simply look at the back of your patch under a light source. Iron on backings appear shiny and transparent in the light. PVC backings are milky and opaque.
If you have a hard time seeing the threads on the back of your patch through the backing, that’s a PVC back. Do not attempt to iron it into place!

Keep Calm and Attach Your Patch
If you’ve never picked up a needle and thread before, we can understand how you’d be worried about the prospect of getting your new custom patches where they need to be. But the truth is attaching a patch is so easy that with the proper tools, anyone can do it.
If you’re buying patches you’ll need to affix yourself, then keep in mind the steps in the process and determine which attachment option is best for your immediate needs. However, if you’re buying patches to sell to others, keep in mind your customers’ abilities and what they might find to be the more convenient option.
Regardless of who will ultimately be attaching the patches, rest assured that all products from Signature Patches are created with the same high quality materials and the same attention to small details. We’ll make sure that your ordered patches are quick and easy to attach to the shirt, jacket, backpack, hat or other item of your choice. If you’re looking for easy access to the above instructions, we’ve created helpful PDFs you can download and keep handy. You can find the instructions by clicking here.


